Quickstart
Build your first form, publish it, and share the link in about two minutes.
This page takes you from an empty account to a live form and your first responses. Pick whichever start suits you: a template, a blank form, or a sentence describing what you need. They all end up as the same kind of form, one you can keep editing and that anyone can fill in without an account.
- Create an account
- Start a form
- Add and edit questions
- Publish
- Share the link
- Read the responses
- Build it from Claude or ChatGPT instead
1. Create an account
Sign up with Google or an email address. The Free plan needs no card and gives you 5 forms and 100 submissions in total (not per month), shared across those forms. Every field type is included.
2. Start a form
The dashboard gives you three ways in:
- Browse templates opens the template gallery. Preview any template, then choose Use this template. Nothing is saved until you change something.
- New form opens a blank form in the builder.
- Create with AI asks you to describe the form in a sentence, for example “Wedding RSVP with guest names, meal choice, and a song request”, and builds the questions for you.
3. Add and edit questions
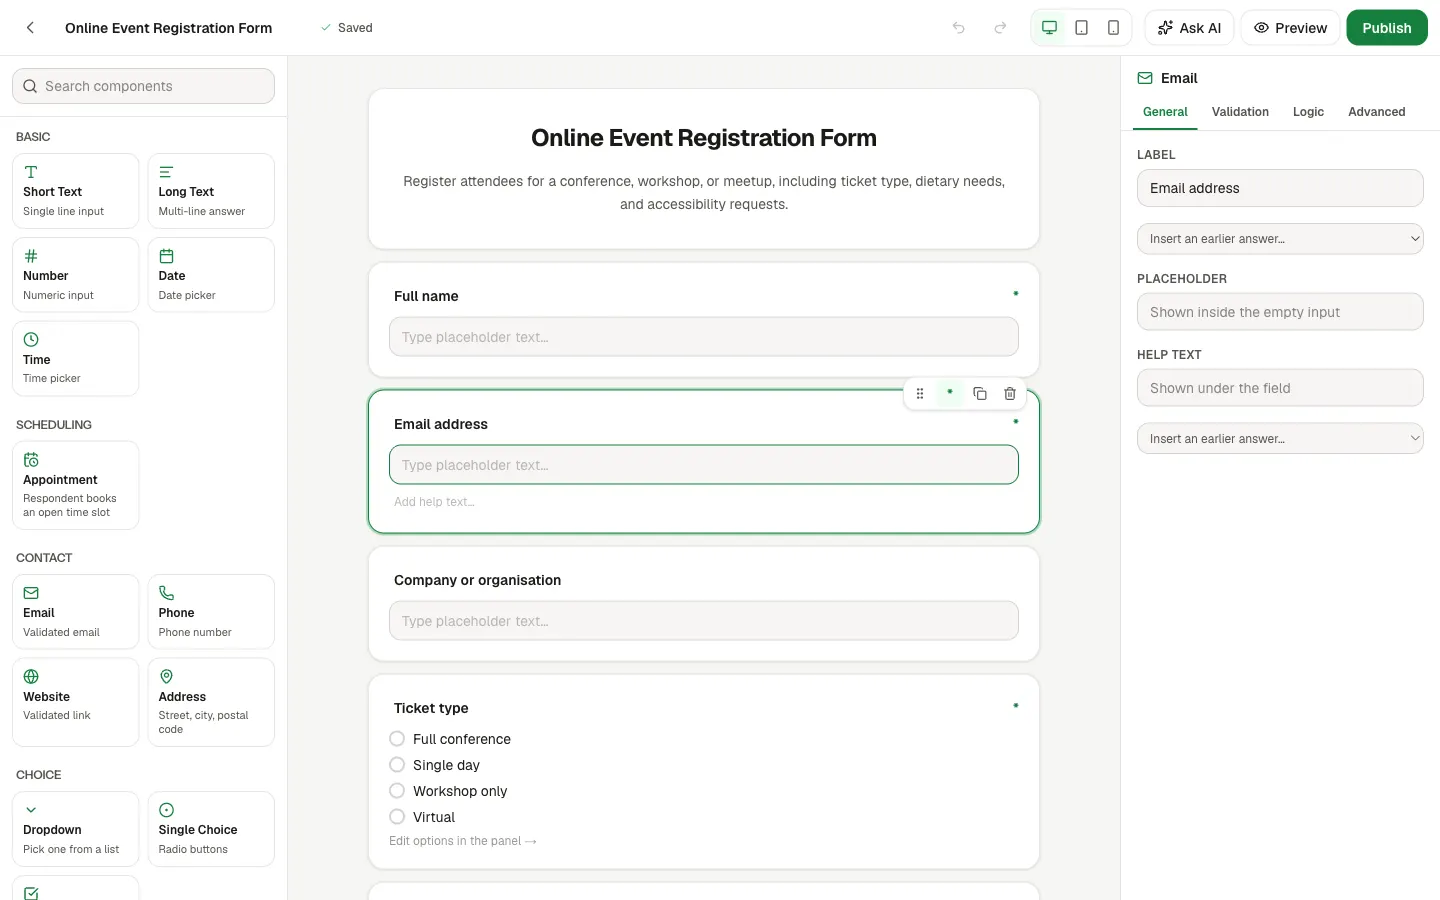
- Add a question by clicking a component in the library on the left, or dragging it onto the form. Search the library if you know what you want.
- Click a question on the form to edit it in the panel on the right. General holds the label, placeholder and help text. Validation makes it required; email, phone, number and link fields are checked automatically. Logic shows or hides the question based on an earlier answer. Advanced changes its field type.
- Reorder by dragging the handle on a question. Duplicate and delete sit beside it.
- Split a long form with a Section Heading to group questions under a title, or a Page Break to turn it into steps.
- Style it by clicking an empty part of the canvas. The right panel then shows form settings: the layout (every question on one page, or one question per screen), the colour theme, and a cover image.
Everything saves as you go; the toolbar says Saved. Preview shows the form exactly as a respondent sees it, and the desktop, tablet and phone buttons beside it change the width. To change several things at once, choose Ask AI and say what you want, like “add a phone number and make the company optional”.
4. Publish
A form starts as a draft, which respondents cannot open. Give it a title, then choose Publish in the top right. The button turns into a status menu you can change at any time:
- Live: the link works and accepts answers.
- Draft: the link is off while you rework the form.
- Closed: the link still opens but stops taking new answers, so nobody lands on a dead page after the deadline.
5. Share the link
Choose Share in the toolbar. With the default setting, respondents never need an account.
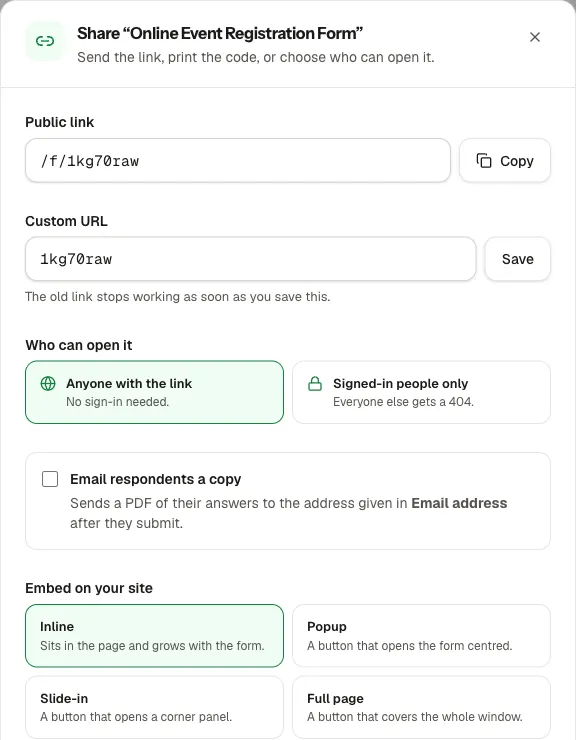
- Public link: copy it into an email, a chat, a social post or a bio. It looks like
/f/signup. - Custom URL: replace the random part with a readable name. The old link stops working as soon as you save.
- Who can open it: anyone with the link, or only people signed in to a Deoochform account. Everyone else gets a page not found, so the form stays hidden.
- Email respondents a copy: sends each person a PDF of their answers. It needs an email question on the form.
- Embed on your site: inline, popup, slide in, or full page. Paste the code where the form should appear.
- QR code for posters and printed handouts, and Email the link to invite people directly.
6. Read the responses
You get an email for every submission, with the answers in the body, so there is nothing to switch on. Responses also land in a table on the form, where you can search, star and export them to CSV or Excel. More in submissions and exports.
To send answers somewhere else as they arrive, connect Slack, Zapier or Google Sheets from integrations.
Build it from Claude or ChatGPT instead
If you already work in an AI assistant, you can skip the builder. Add https://deoochform.com/api/mcp as a custom connector in Claude, ChatGPT, or any MCP client, sign in when it asks (the setup guide has the clicks for each one), then ask for the form in plain English:
Create a workshop signup form with name, email,
which session they want (morning or afternoon),
and dietary requirements. Make name and email required.
The assistant creates the form in your account and replies with the link. It shows up on your dashboard straight away, and you can open it in the builder to keep editing. Later, ask “How many people signed up for the morning session?” and it reads the responses and counts them for you.
Next
- Every field type, including payments, signatures and appointments
- Submissions and exports
- MCP server and tool reference
- Templates to start from